Product Detail
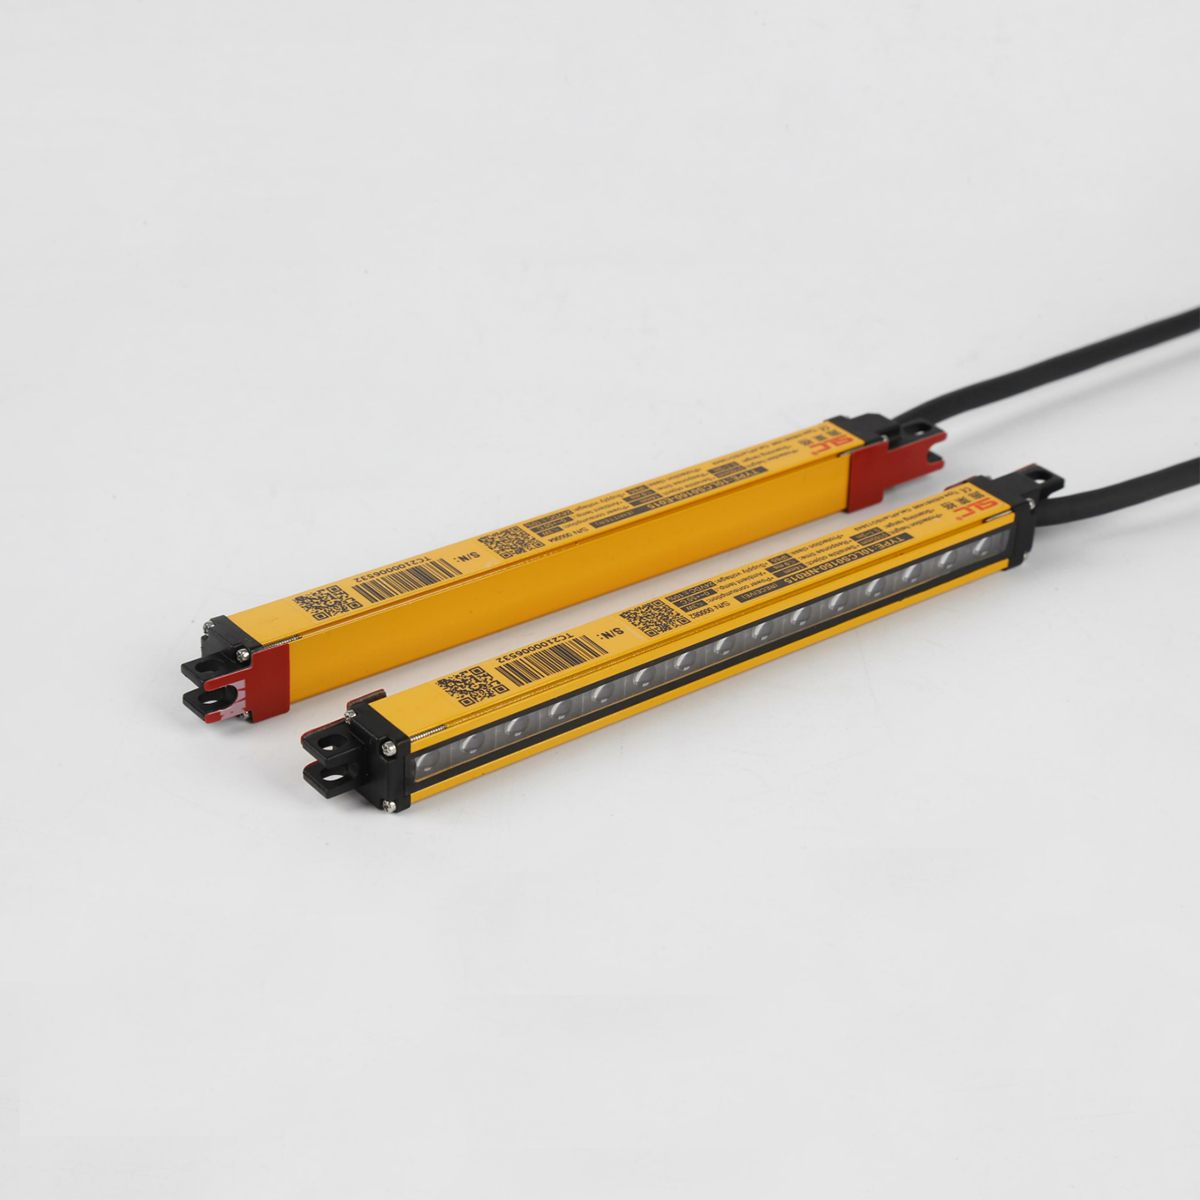
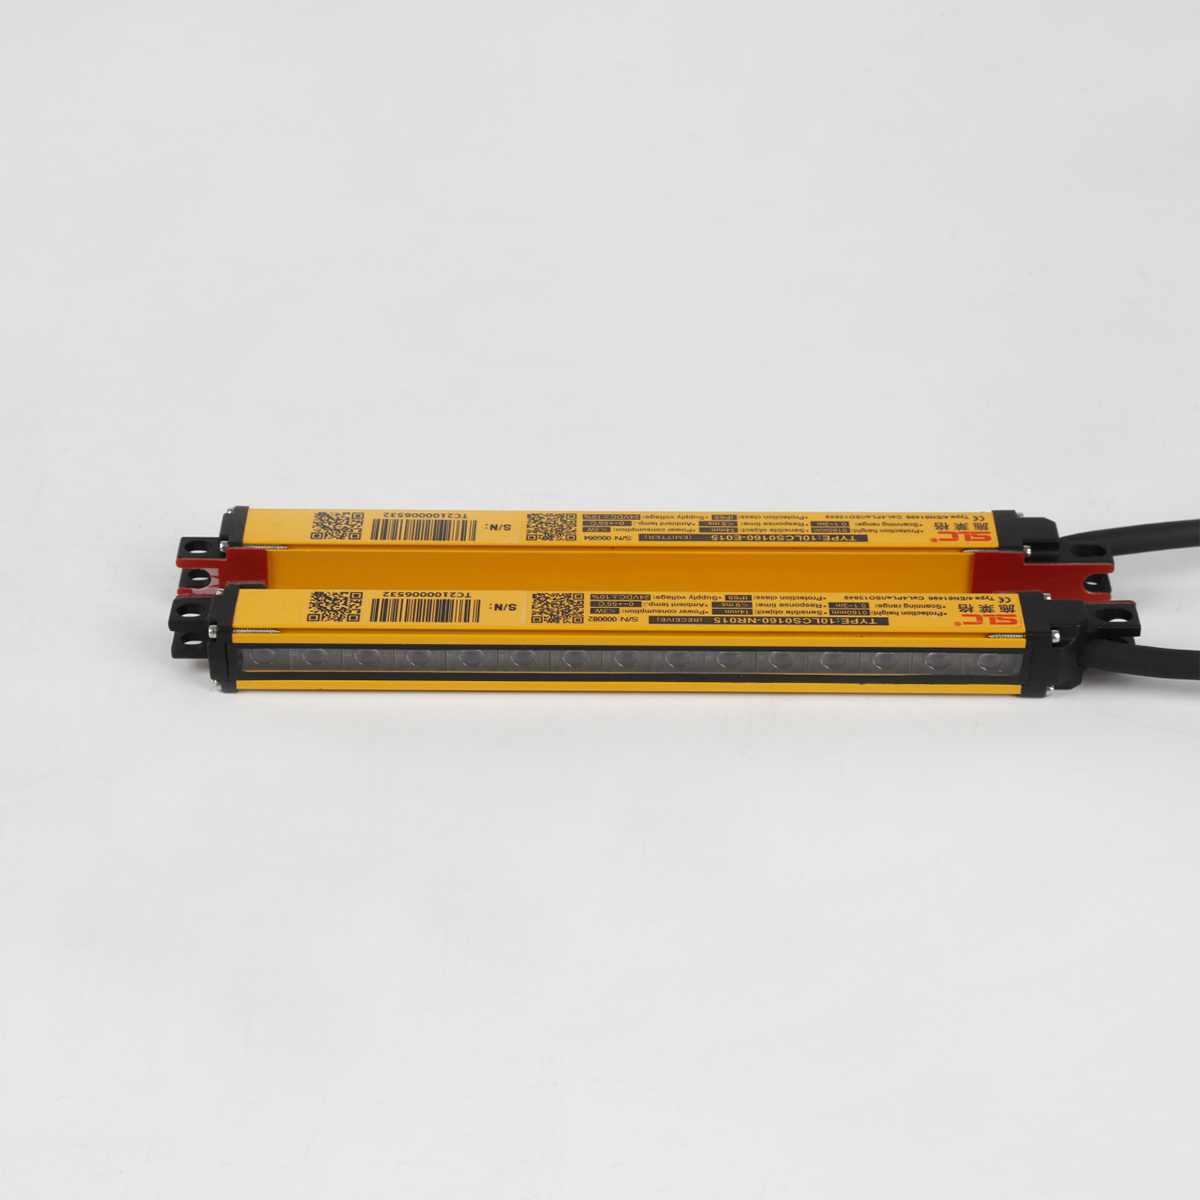
LCS series miniature safety grating product structure model description
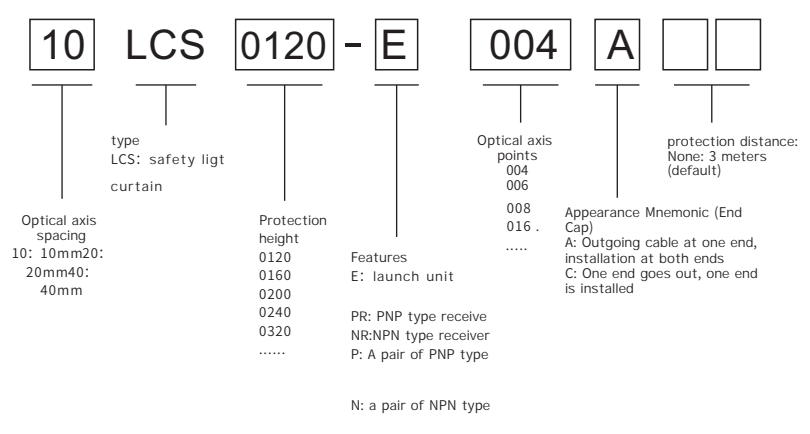
※Appearance mnemonic code C type requires additional purchase of "LCS back mounting bracket"
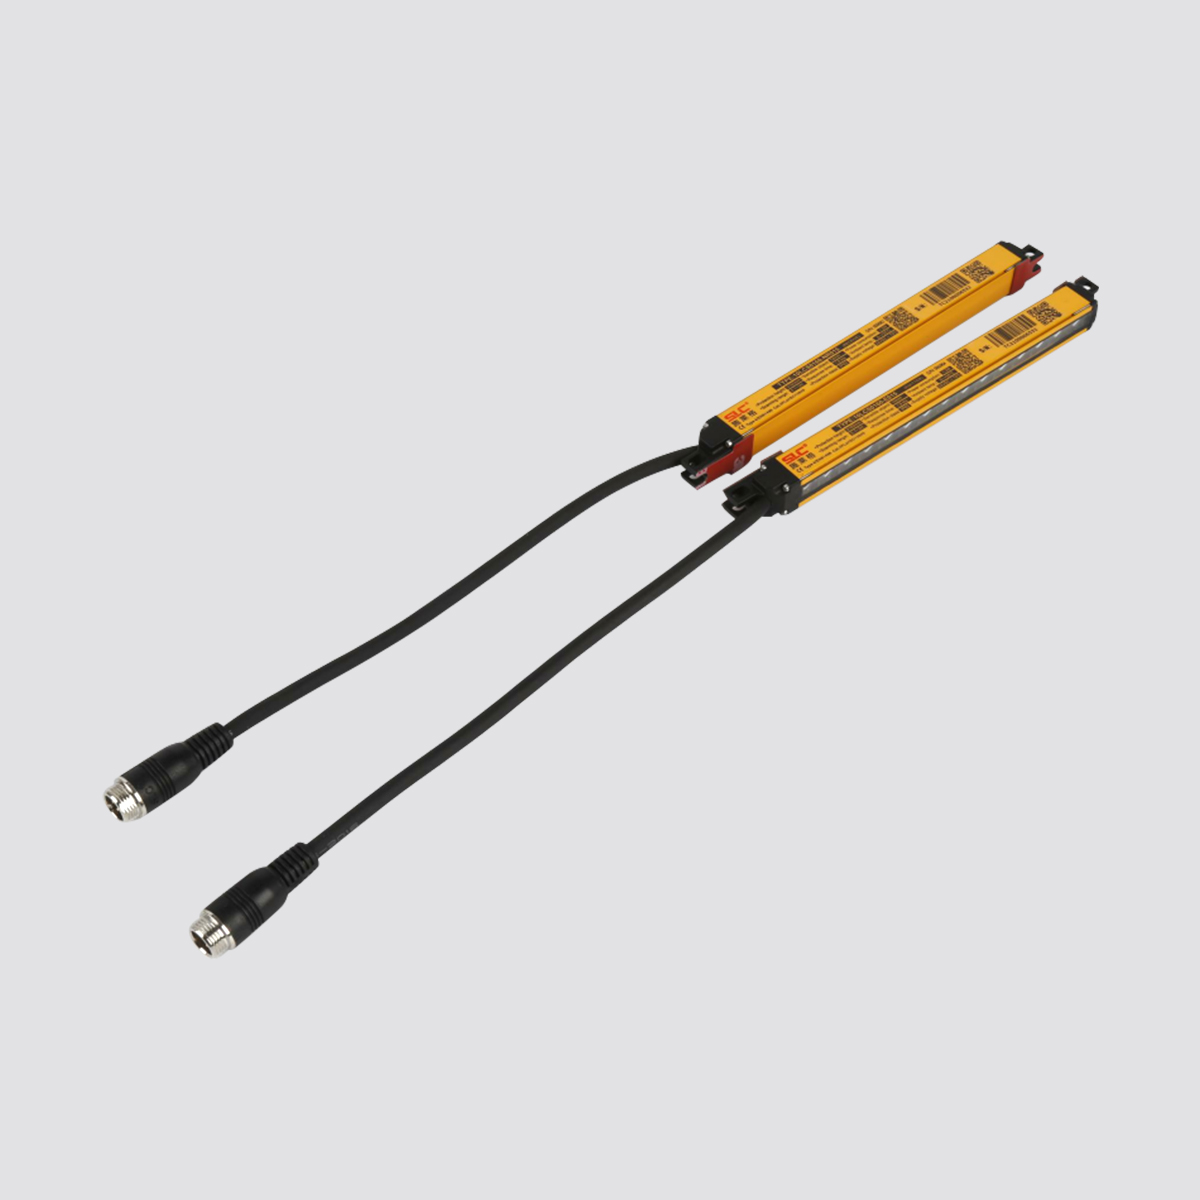
◆ Dual-channel design reduces the probability of dangerous failure of safety gratings and improves safety performance;
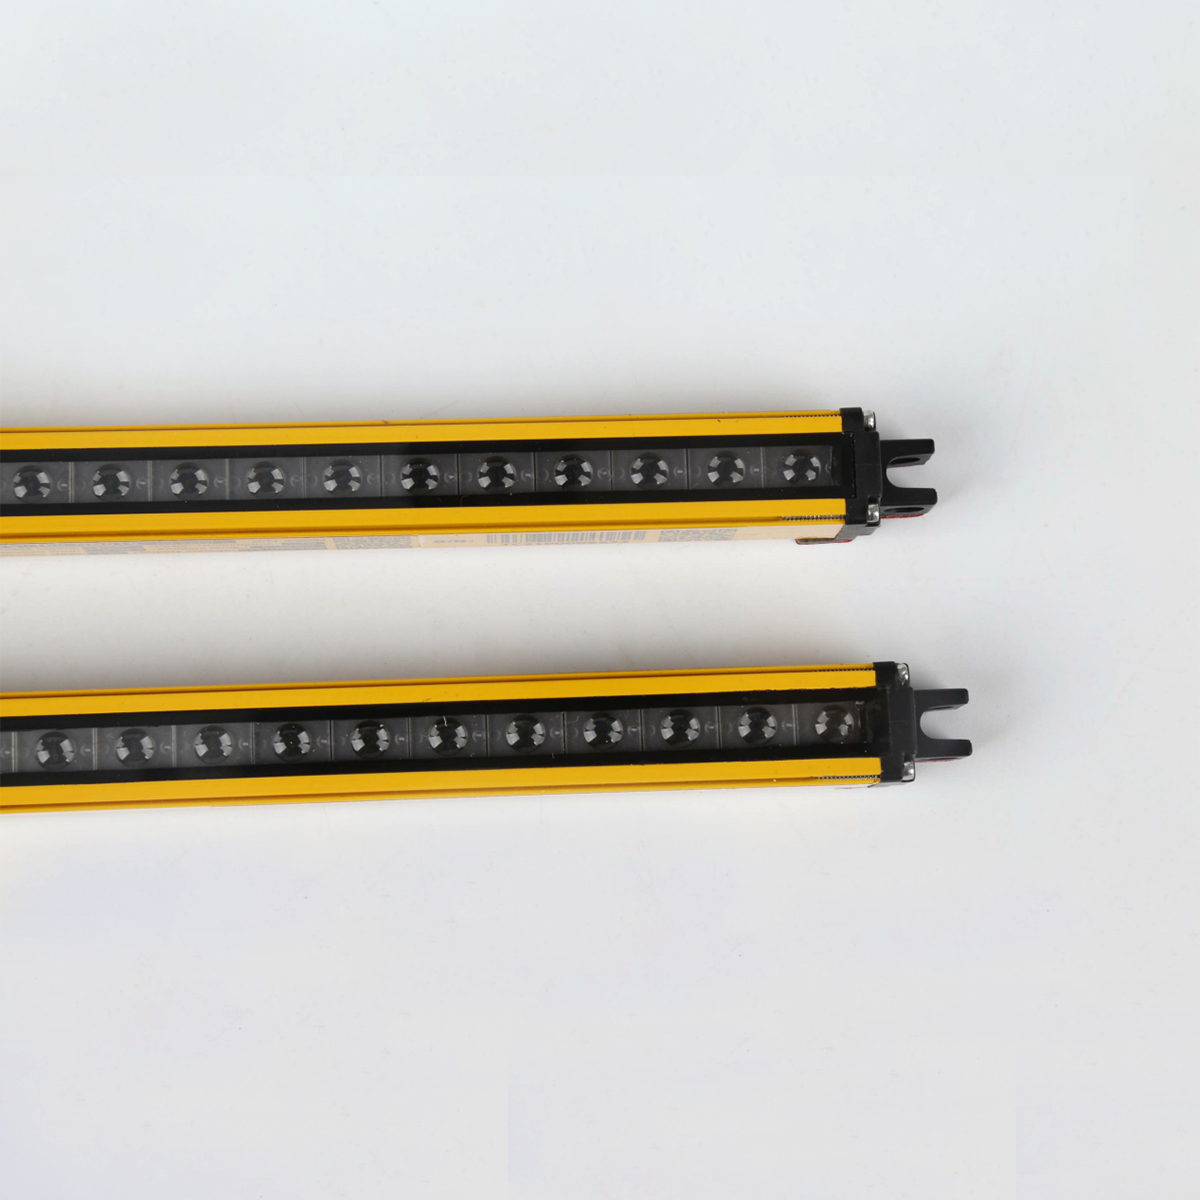
◆ The grating resolution is 14mm, 25mm, 45mm optional;
◆ Adopt the most advanced infrared light synchronization technology, easy to install and use;
◆ C-type grating can realize single-ended without dead zone;
◆ It has good field application ability, strong anti-light interference and antielectromagnetic interference ability;
◆ Pulse test, self-diagnosis of output circuit, short-circuit fault detection and other means to ensure functional safety;
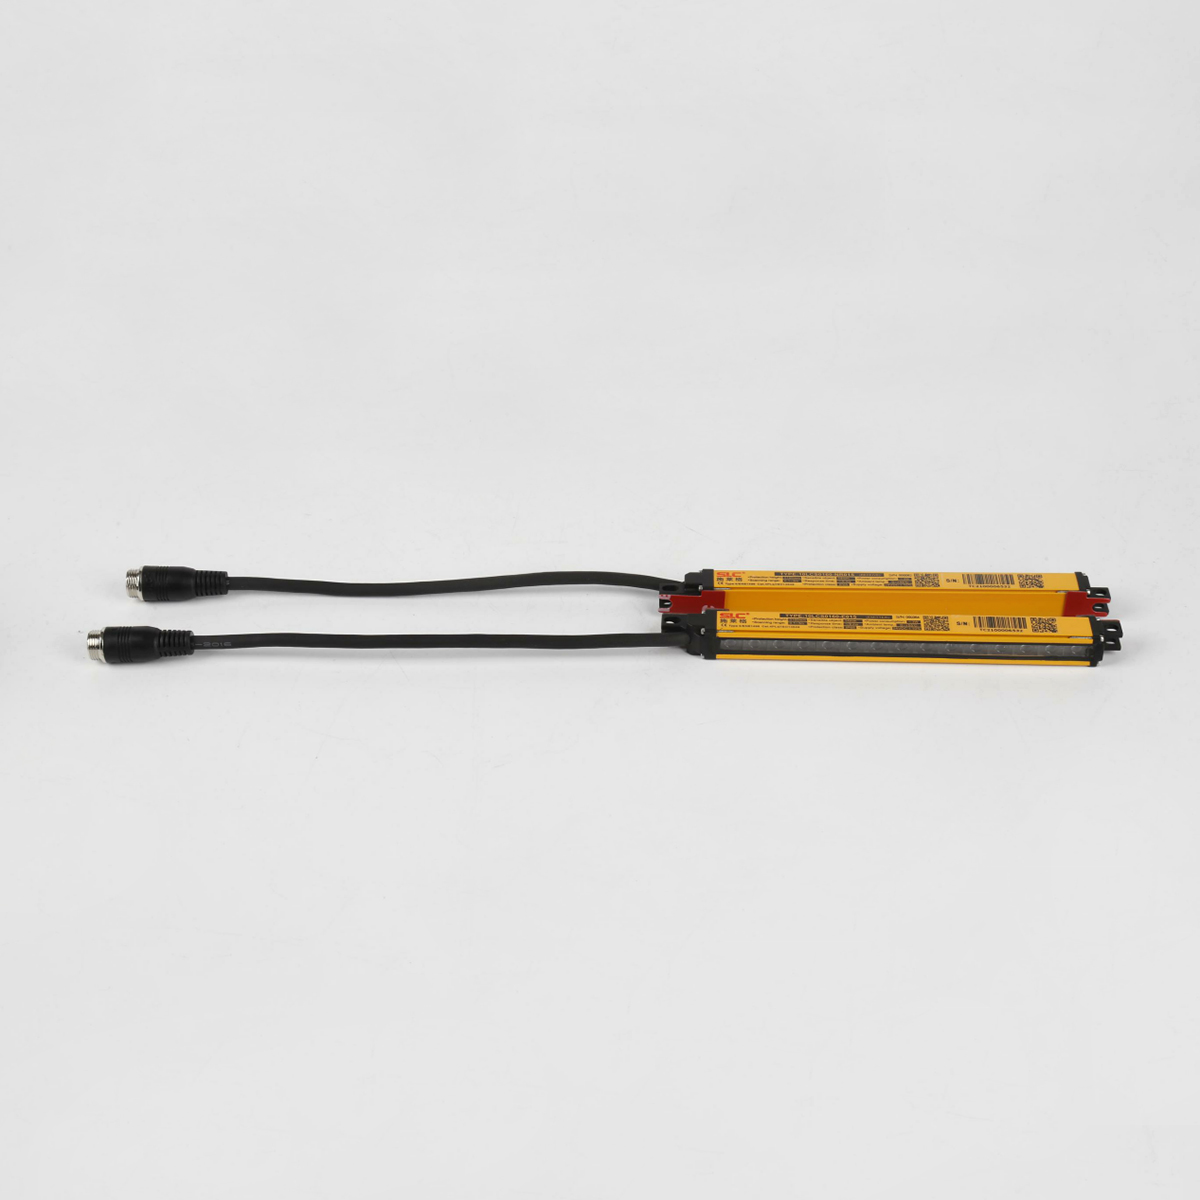
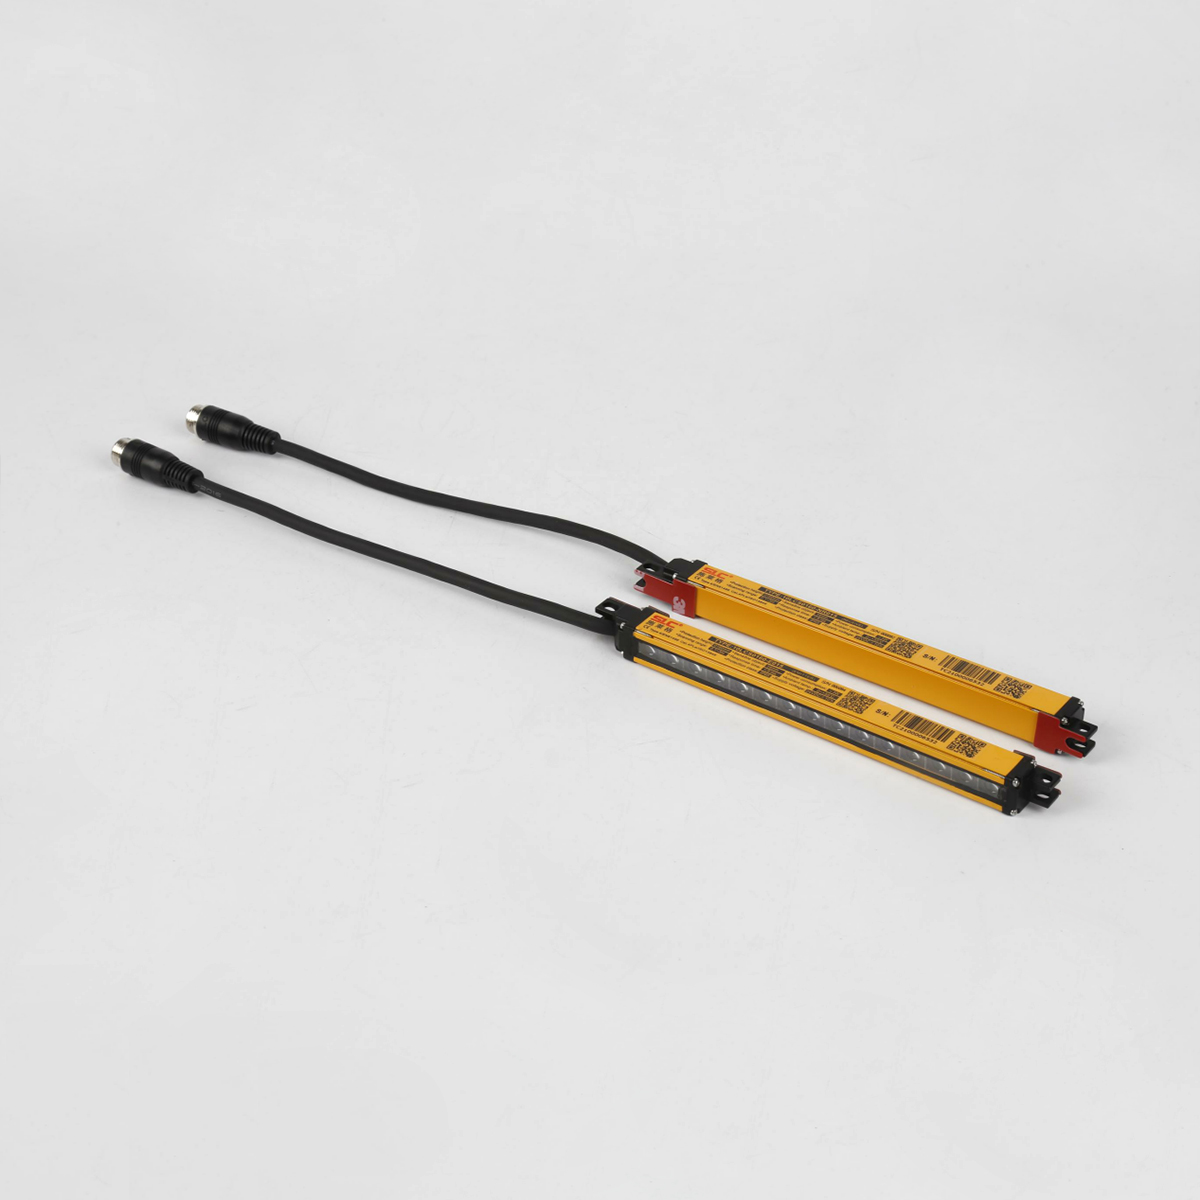
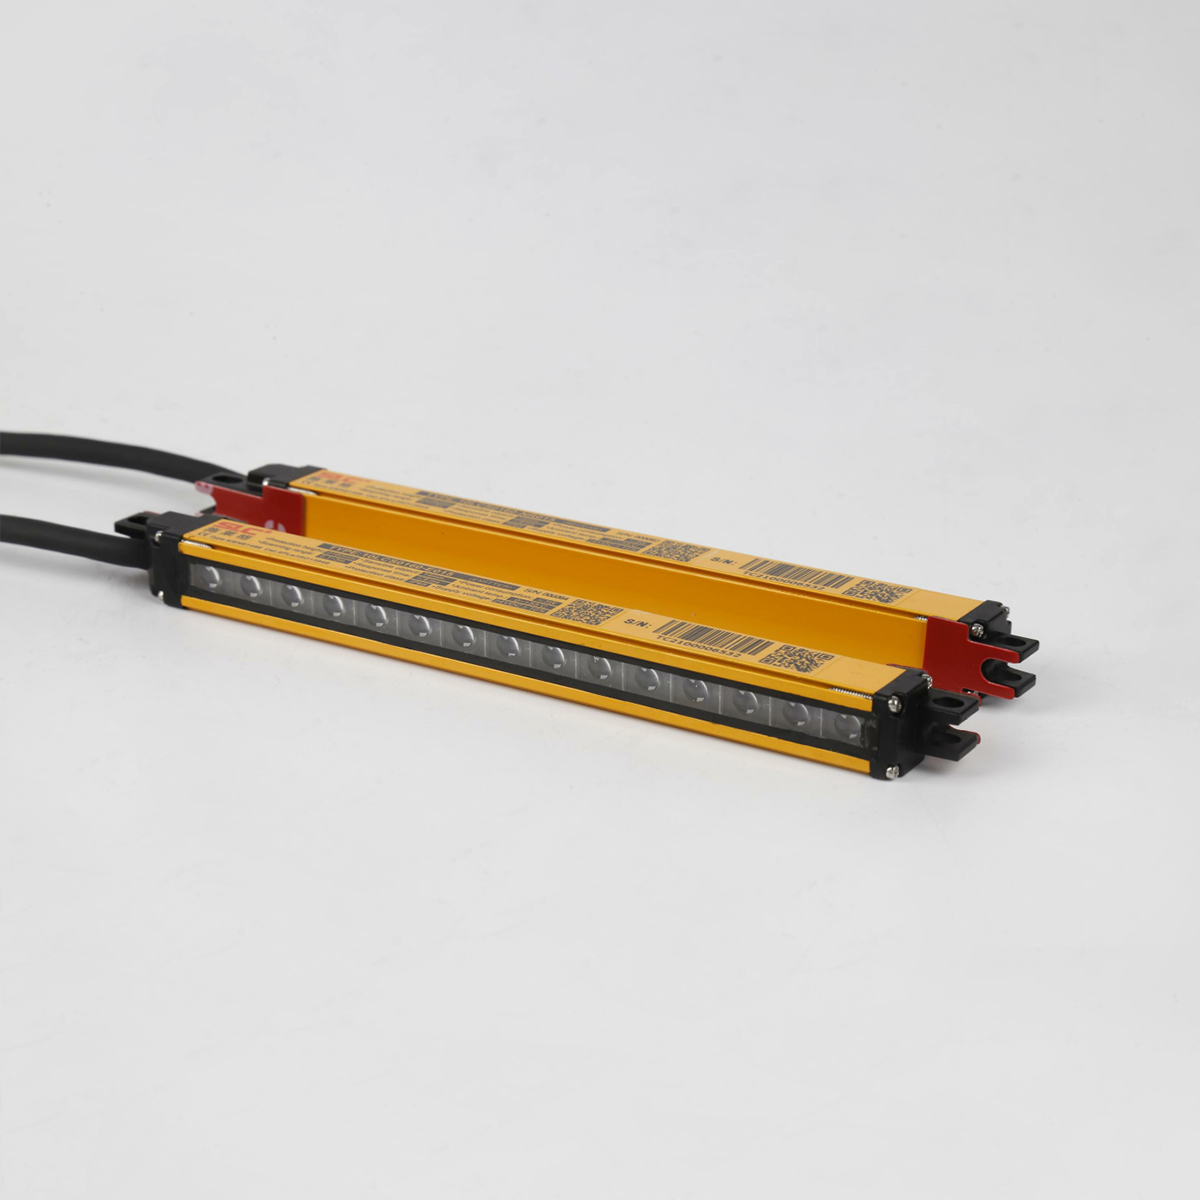
◆ Small in size, the cross-sectional size is only 15×15mm;
◆ It comes with two ends installed, no need to install the bracket, easy to use;
LCS series miniature safety curtian technical parameters
LCS series miniature safety light curtain (10/20/40 series) |
Safety standard | Pleper ISO13849-1 Cat.4 Type4 per IEC61496-1&IEC61496-2 | Maximum capacitive load | 0.1uF |
Optical axis spacing (resolution) | 10mm (14mm) 20mm (25mm) 40mm(45m) | Voltage | +24V±10% |
Detection distance | 0.1-1m,0.1-3m | Maximum power | <3W |
Number of optical axes | 4-191 | Shell protection | IP65(Can be customized IP67) |
Protection height | 100-1910mm | Working temperature | 0~55°C |
Light source wavelength | 940nm | Storage temperature | -20°C~70°C |
Response time | See selection table | Relative humidity | 15%~85% |
Output type | NPN/PNP | Impact | 10g/20mS |
Maximum output current | 200mA | Vibration | 0.35mm/10~55Hz |
Average Hourly Hazard Failure probability PFHd | <5.3x10⁻⁸ |
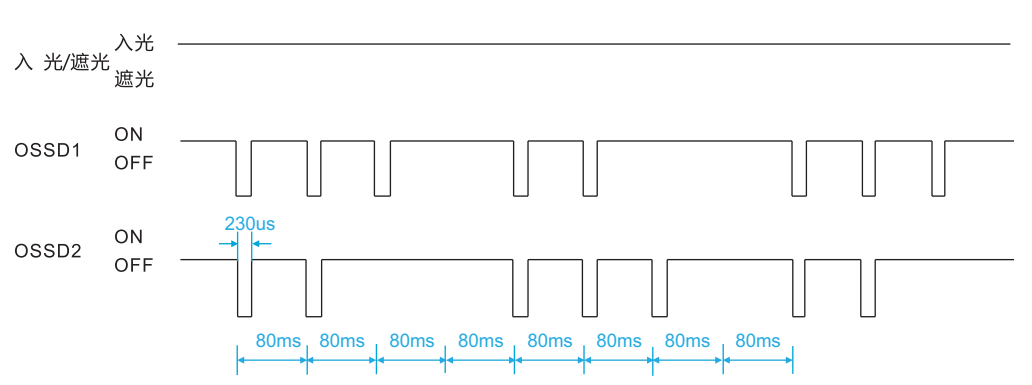
LCS series miniature safety light grid OSDD output self-diagnosis sequence
LCS series miniature safety light grid has OSSD output self-diagnosis function. During the normal light-passing OSSD output of the grating, the internal control
timing control unit of the grating periodically and actively turns off the outputs of OSSD1 and OSSD2 in turn. When OSSD1 or OSSD2 is closed for a short time,
the internal timing control unit of the grating detects whether the level of OSSD1 or OSSD2 is consistent with the expected result. If it is consistent, the OSSD
switch is in normal working state; if it is inconsistent with the expected result, the OSSD In the event of a failure, the system will immediately shut down the two
OSSDs to ensure functional safety. At this time, the red LED indicator light of the receiving grating will flash to indicate the failure. Therefore, when the load
connected to the LCS safety light grid is a PLC or a fast intelligent device with MCU control, it is necessary to filter out the self-checking pulse (recommended
1ms) in the program to prevent the PLC or MCU from detecting this waveform and causing the machine to stop. The figure below is the timing chart of the output waveform of the PNP-type grating self-diagnosis
LCS series miniature safety light grid common troubleshooting
LED indicator light | Illustrate |
launcher | 
| green light | works fine |

| 1Hz red light flashing | Launch tube failure |

| 2Hz red light flashing 2Hz traffic lights flash | power failure |

| alternately 2Hz light | Select circuit failure |

| light flashes | software failure |
receiver | 
| green light | All beams on |

| red light | There is a beam interruption (not on the right light) |

| 1Hz green light flashing | disturbing |

| 2Hz red light flashing | Abnormal power supply |

| 1HZ red light flashes | Output error Overload Short circuit etc. |

| 2Hz green light flashing | software failure |

| 2Hz red and green flash alternately | Select circuit failure |

| 1Hz red and green flash alternately | Primary and secondary MCU communication error |
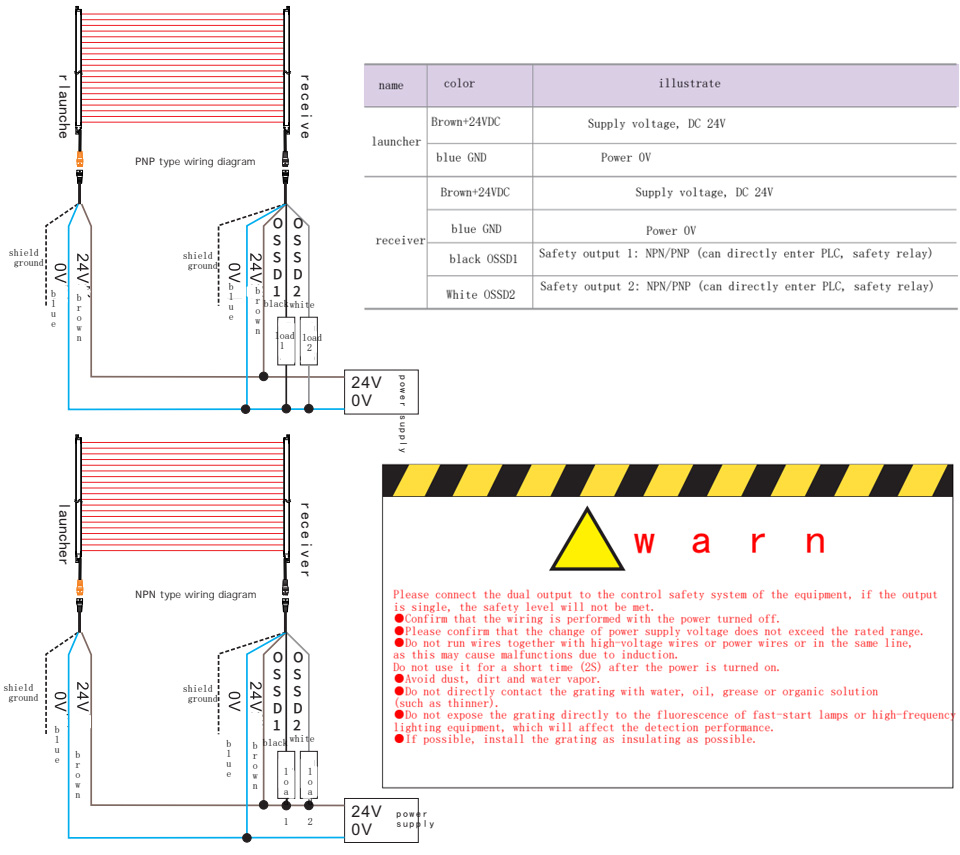
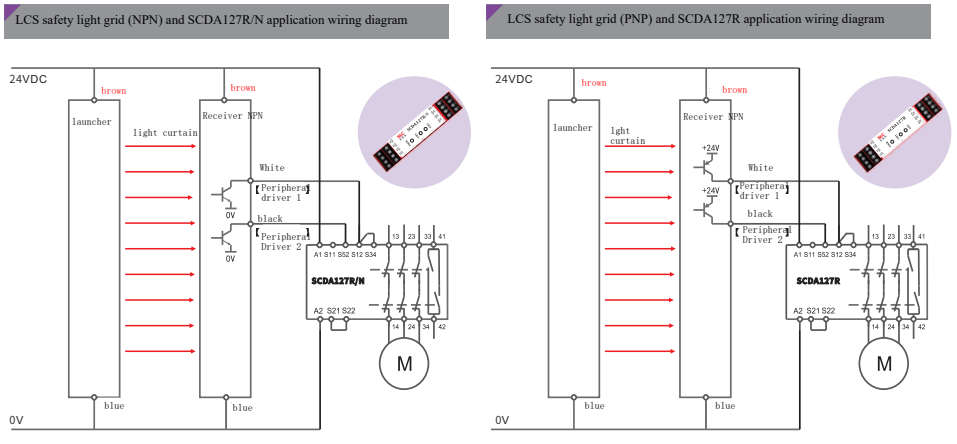
Definition and application wiring diagram of LCS series miniature safety light grid signal interface
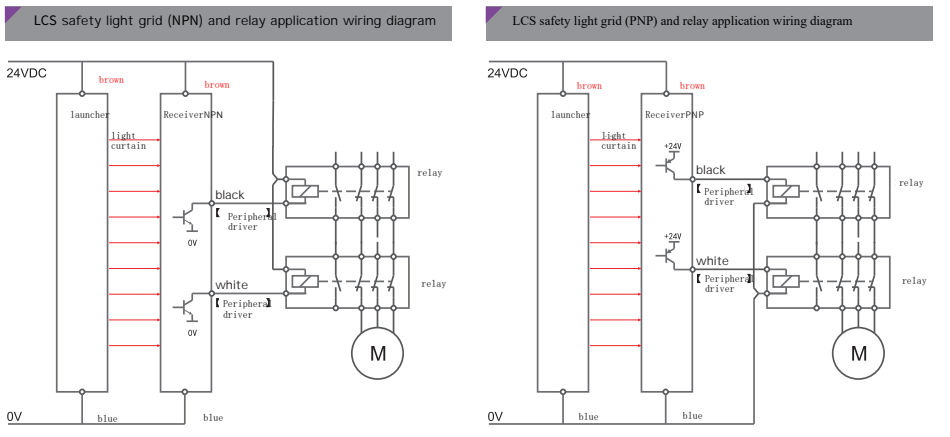
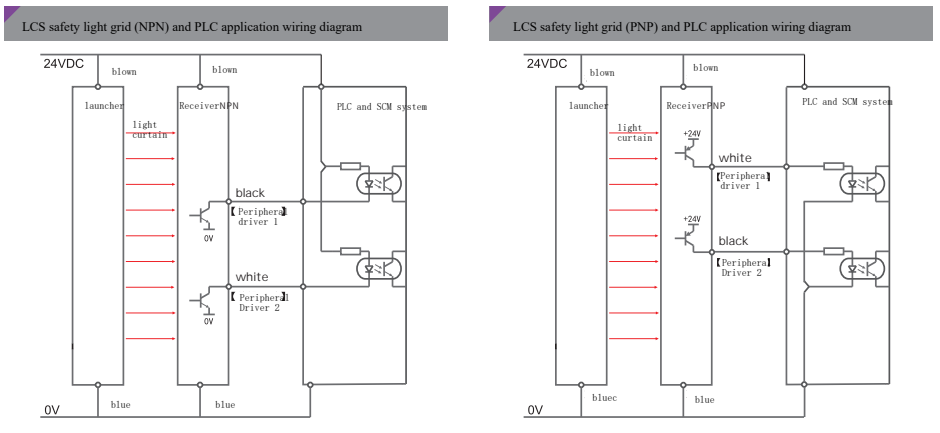
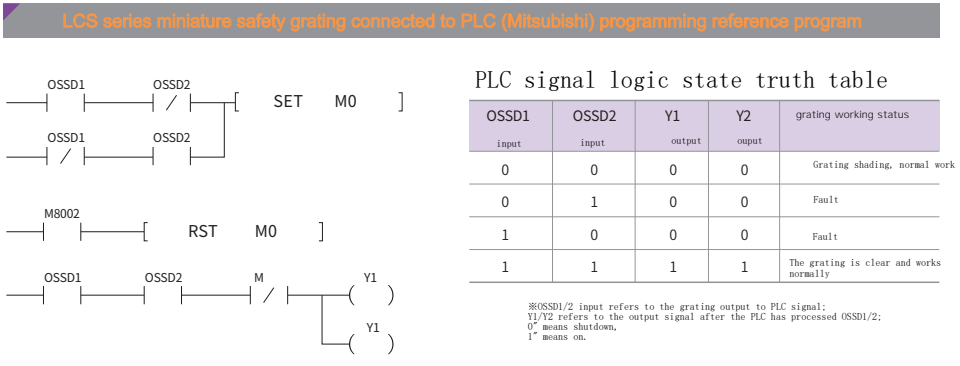
Specification selection and installation size of LCS series miniature safety grating
10 Series Installation and Dimensions
Installation at both ends: 10LCS
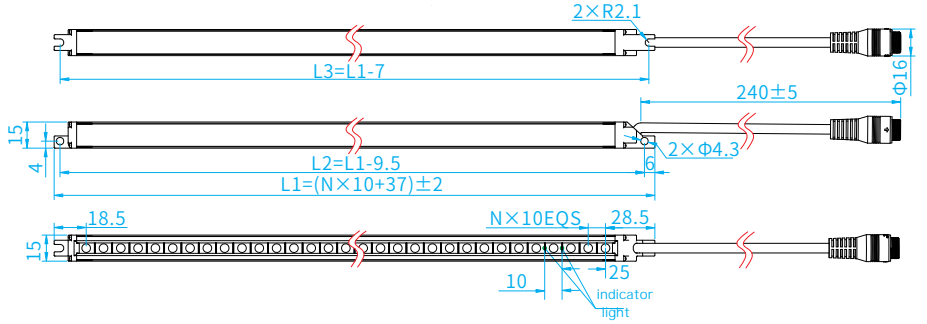
Back mount (optional back mount bracket): 10LCS□□□□-□□□□C
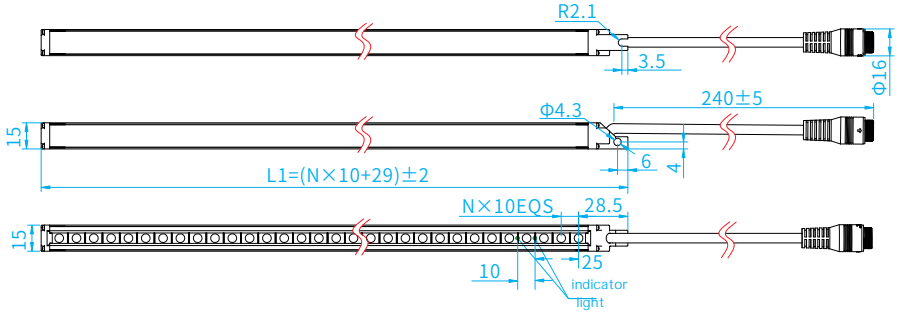
※Affected by product configuration and manufacturing process, the actual product size and weight may be different, please refer to the actual product
10 series (optical axis spacing: 10mm, resolution: 14mm)
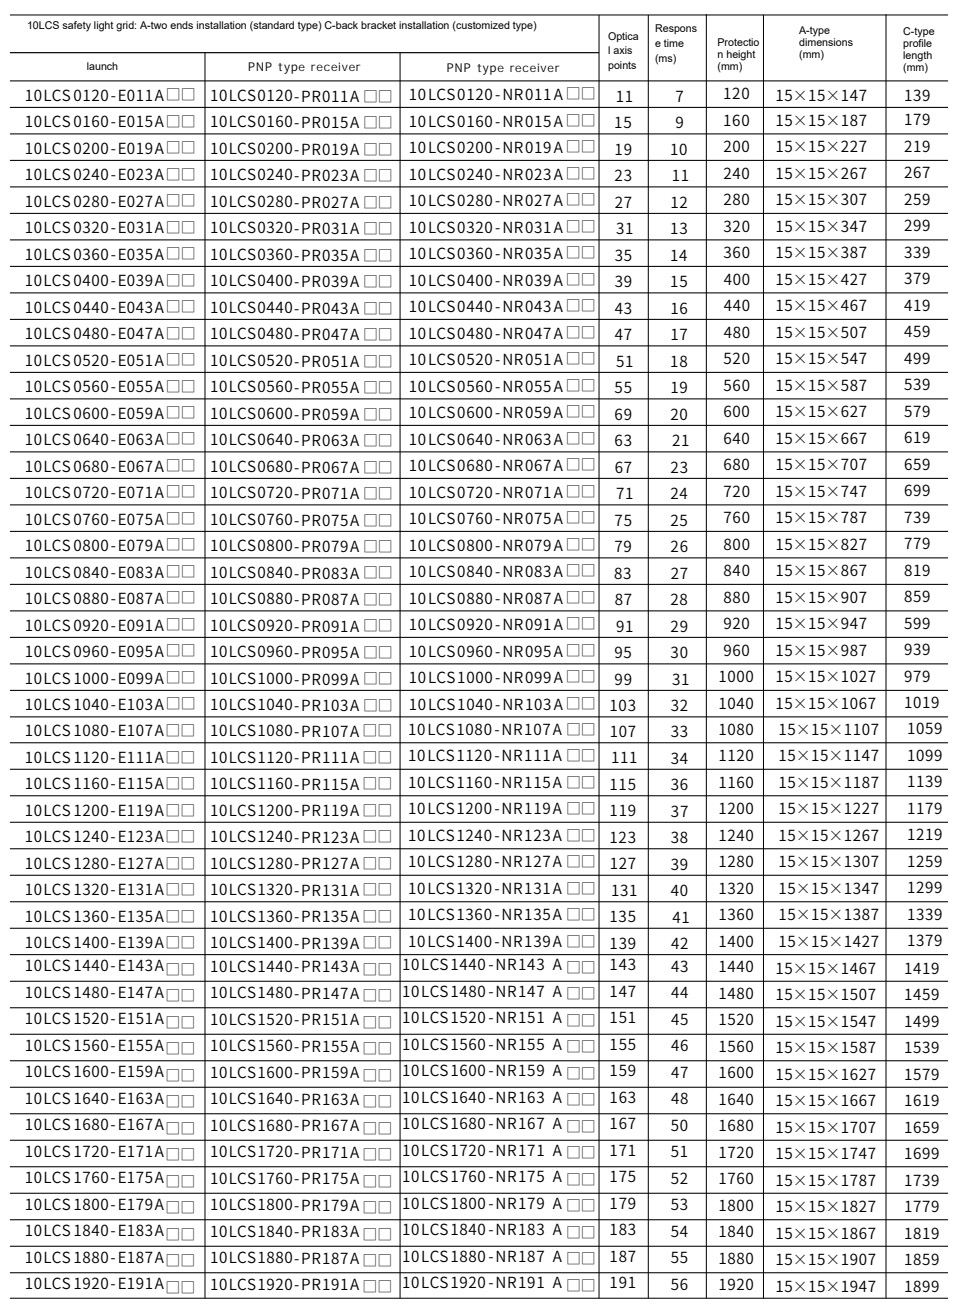
※ n: number of light spots
※ The above are some specifications and models
※ Protective height: the effective height that can detect the test rod (diameter is the length of the distance) = (n+1) × optical axis distance Degree 4.5M, 6M, 10M need to be noted.
20 Series Installation and Dimensions
Installation at both ends: 20LCS□□□□-□□□□A
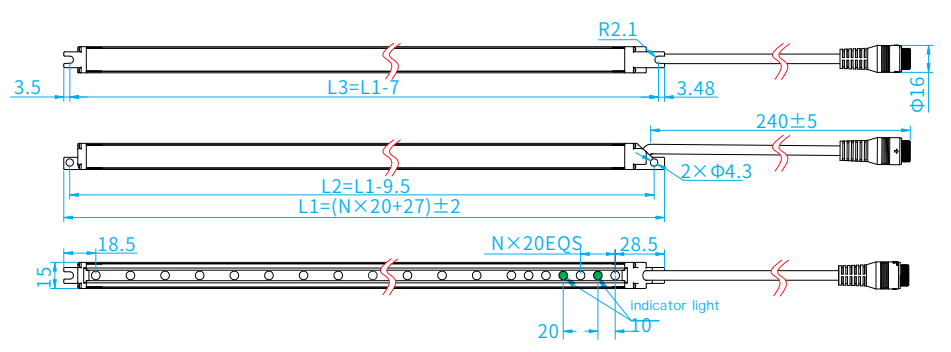
Back mount (optional back mount bracket): 20LCS□□□□-□□□□C
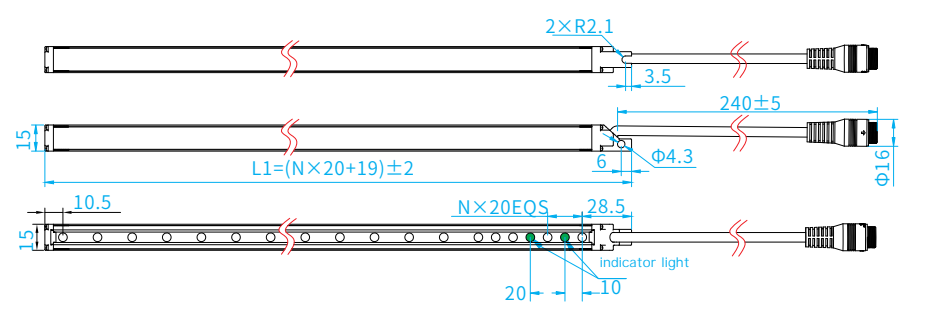
20 series (optical axis spacing: 20mm, resolution: 25mm)
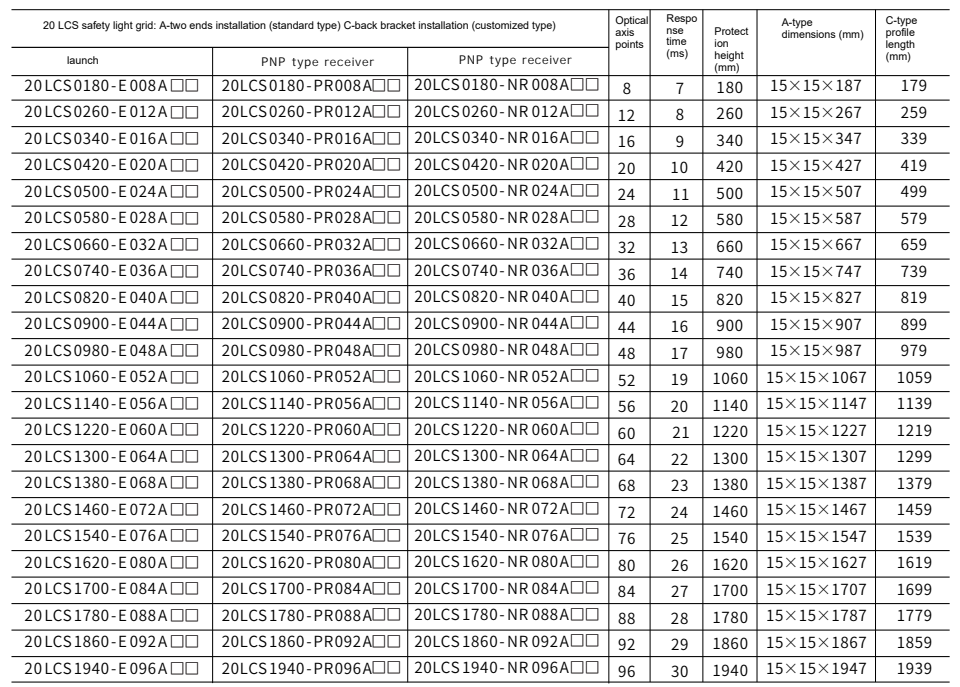
※ n: Number of light spots
※ The above are some specifications and models
※ Protective height: the effective height that can detect the test rod (diameter is the length of the spacing) = (n+1) × optical axis spacing
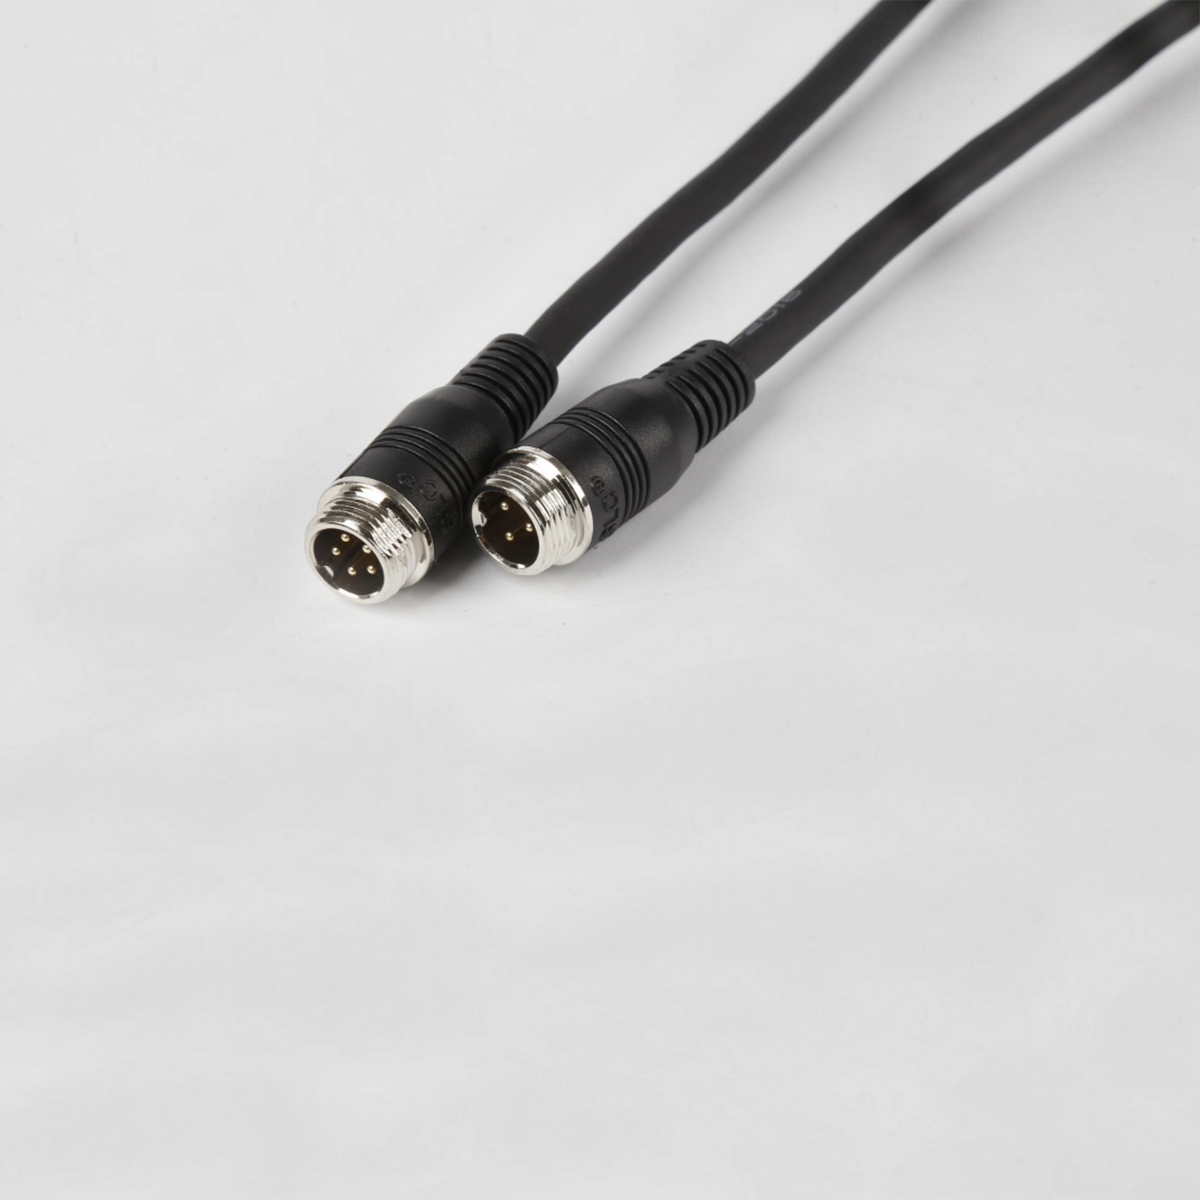
※ The cable needs to be purchased separately, the standard length is 3M, other lengths are 4.5M, 6M, 10M, please note
※ Affected by product configuration and manufacturing process, the actual product size and weight may be different, please refer to the actual product
40 Series Installation and Dimensions
Installation at both ends: 40LCS□□□□-□□□□A
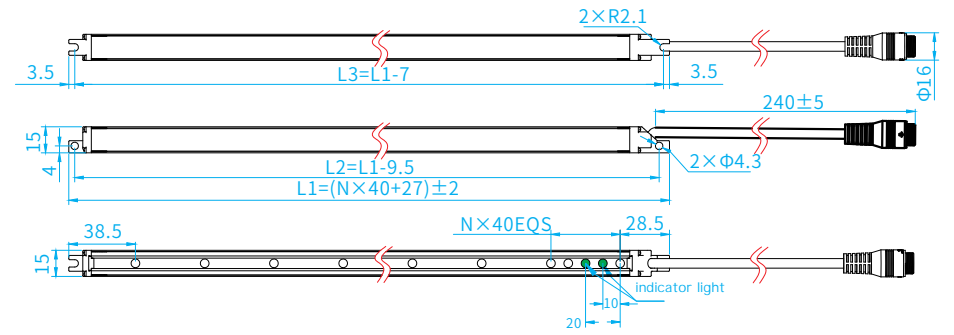
Back Mounting (Optional Back Mounting Bracket) 40LCS□□□□-□□□□C
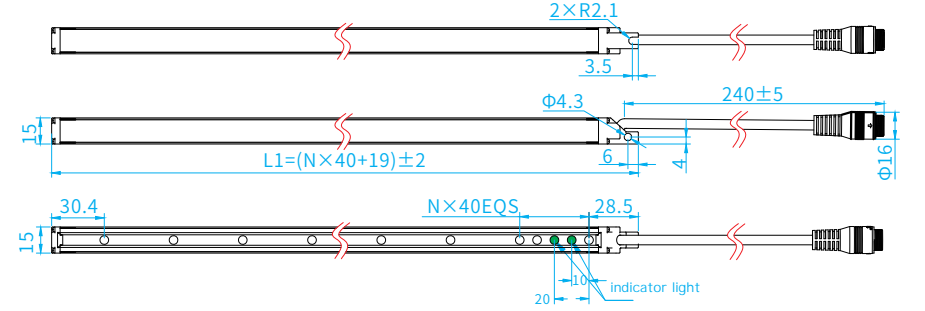
40 series (optical axis spacing: 40mm, resolution: 45mm)
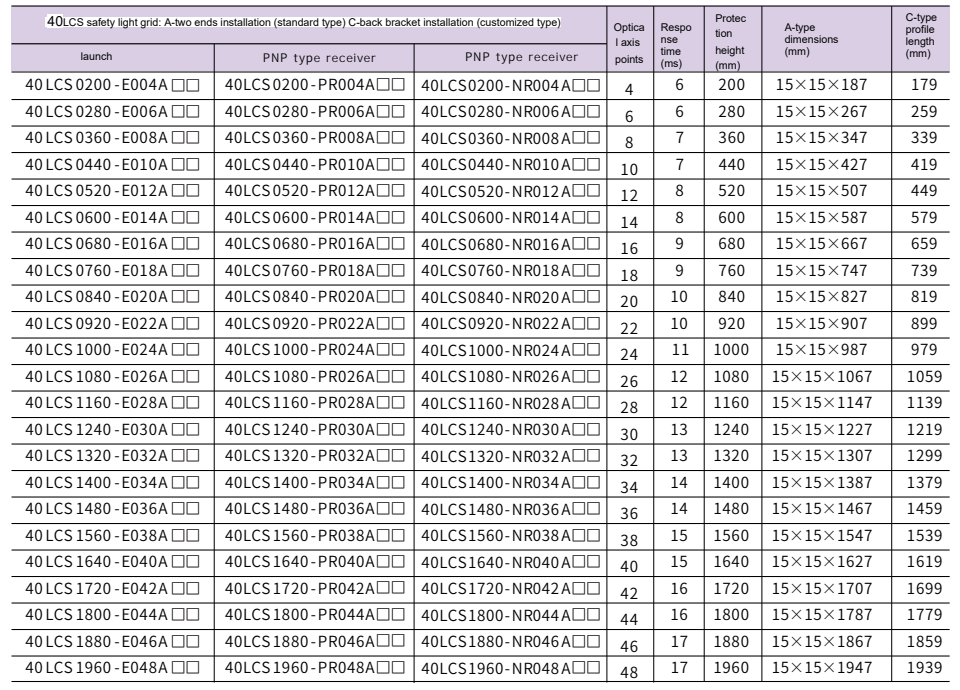
※ n: Number of light spots
※ The above are some specifications and models
※ Protective height: the effective height that can detect the test rod (diameter is the length of the spacing) = (n+1) × optical axis spacing
※ The cable needs to be purchased separately, the standard length is 3M, other lengths are 4.5M, 6M, 10M, please note
※ Affected by product configuration and manufacturing process, the actual product size and weight may be different, please refer to the actual product
LCS Series Back Mounting Rack Selection and Size
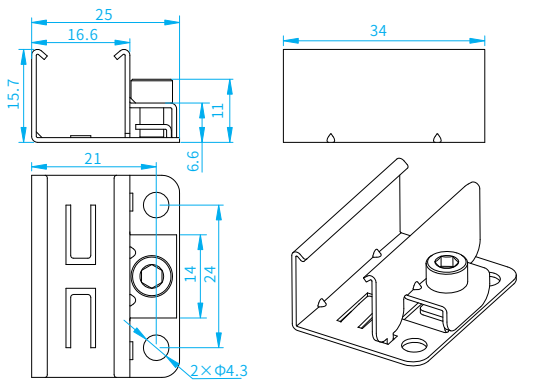
LCS safety light grid accessories selection table |
Accessory name | model | order number |
LCS back mount bracket | LCSZJ-S1 | LCS253424-S1 |
Note: Accessories need to be purchased additionally |
※Affected by product configuration and manufacturing process, the actual product size and weight may be different, please refer to the actual product
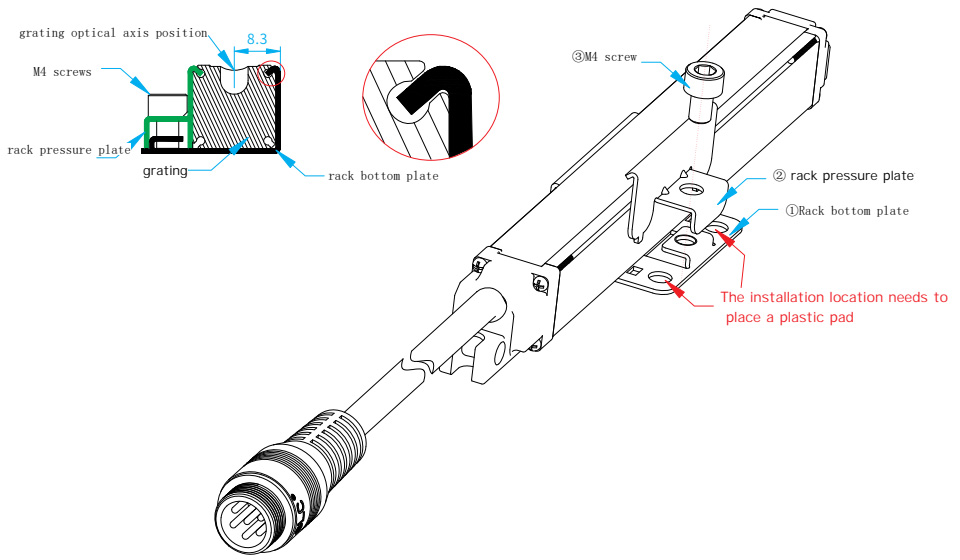
LCS series miniature safety grating back mounting bracket installation method
①Hook the bracket bottom hook into the groove on the upper edge of the grating shell, and stick to the grating shell;
②Hook the hook of the bracket pressing plate into the groove on the other side of the grating shell, close the grating shell, and insert the lower two bosses into the corresponding holes of the bracket bottom plate;
③Use the matching M4 screws to fasten the bracket pressing plate It is firmly locked with the bottom plate of the rack;
④Finally, use the self-provided M4 or M3 screws and matching M4 plastic gaskets to fix the installed grating and bracket components to the use environment through the two Φ4.3 holes in the bracket bottom plate.
 +86-0755-29898410 +86-0755-29898460
  ron@xaori.net


